
Pipeline module
Overview
The Pipeline module is available for the processing of FASTQ files generated using Parse Biosciences’ Evercode technology.
This module supports FASTQ files generated using the following Parse Biosciences Evercode kits:
- Whole Transcriptome (WT) Mini, WT, WT Mega, WT Mega 384
- TCR Mini, TCR, TCR Mega
- BCR Mini, BCR, BCR Mega
This FASTQ file processing module handles essential tasks such as barcode correction, read alignment, read deduplication, and transcript quantification. These quantified transcripts are then used to generate a cell-by-gene count matrix used for downstream analyses.
Further details about the Parse Biosciences pipeline (also known as "split-pipe") that runs in the Trailmaker Pipeline module are available to customers on the support suite.
Pipeline Run Details page
See also: Guided walkthrough: Pipeline module set-up
Create a new run
When you first navigate to the Pipeline module of Trailmaker, your list of Pipeline Runs will be empty. To start your first Pipeline Run with Parse Biosciences data, select the ‘Create New Run’ button:
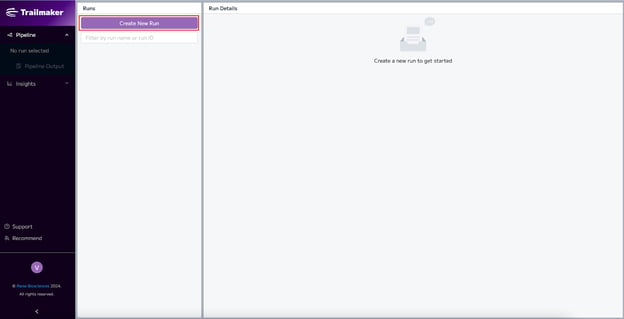
This action opens the Pipeline module wizard, which guides you through Run creation, experimental information input, and data upload.
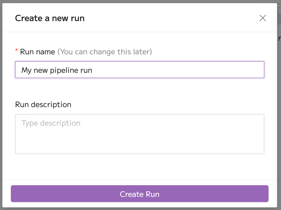
In the first step of the wizard, provide the new Run with a name and a description (optional).
Experimental setup
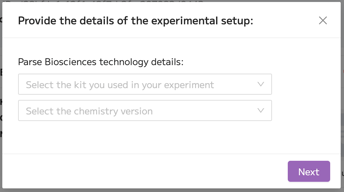
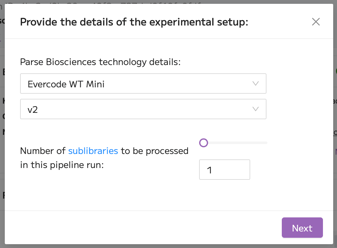
Next, provide the details of the experimental setup using the dropdown menus. Specifically, select the Parse Biosciences technology that you used (WT Mini, WT, WT Mega, WT Mega 384, TCR Mini, TCR, TCR Mega, BCR Mini, BCR, BCR Mega), and the chemistry version of your kit (v1, v2, v3 or v4). Note that the chemistry field is dynamic, with the options tailored to the available options for the selected kit.
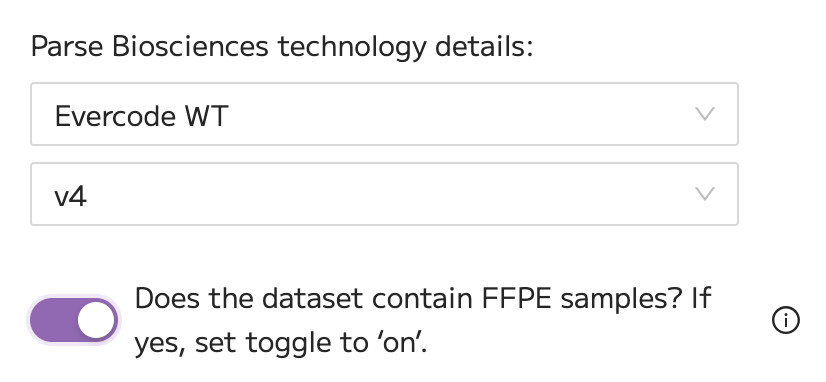
If your dataset contains FFPE samples processed using an Evercode WT FFPE kit, change the toggle selection to 'on'. Note that the FFPE option is only available when v4 chemistry is selected.
When you have input the kit type, another field will appear for you to select the number of sublibraries that you would like to process in the current pipeline run. Note that this field is dynamic, with the range determined by the kit choice. In the example below, the WT Mini kit is selected, and therefore the number of sublibraries can be 1 or 2.
If you selected an immune profiling (TCR or BCR) kit, an additional toggle will appear in this step of the wizard. With this toggle, you can select to run the pipeline with paired whole transcriptome data when the toggle is set to "on". If you only have immune profiling data with no parent WT FASTQ files, set the toggle to "off".
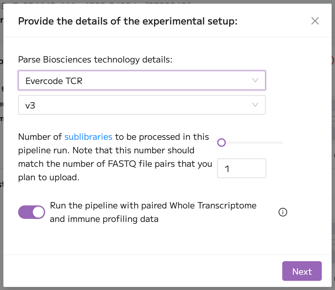
When you are ready to continue, click ‘Next’.
Sample loading table
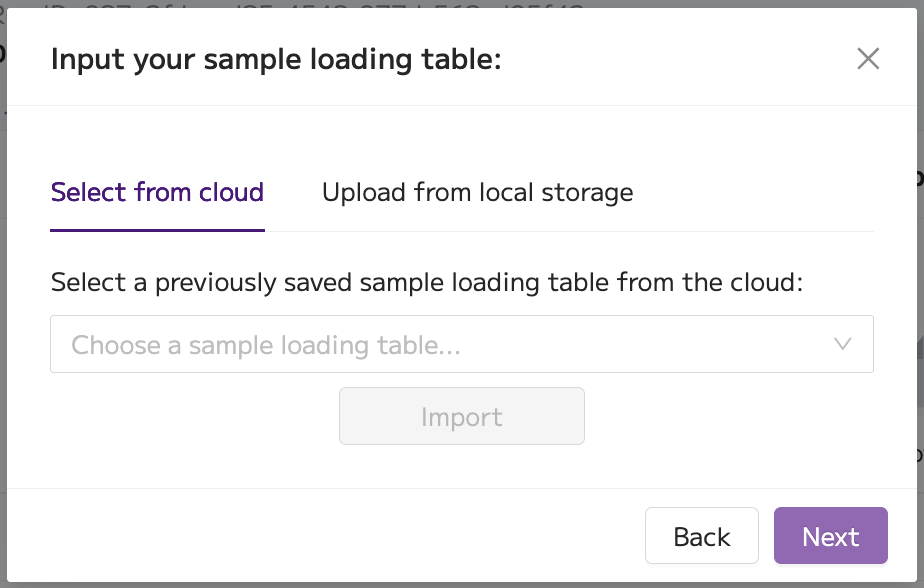
In the next step, specify your sample loading table by importing from the Sample Loading Table module or by uploading a file from your local storage.
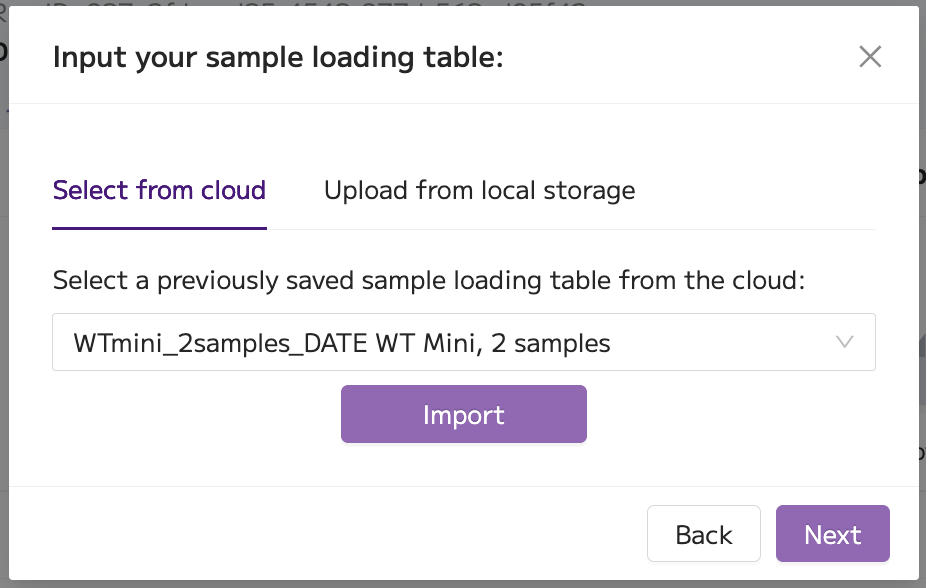
The first tab, 'Select from cloud', enables import of a sample loading table from the Sample Loading Table module. Simply select a saved sample loading table from the dropdown menu and click 'Import'.
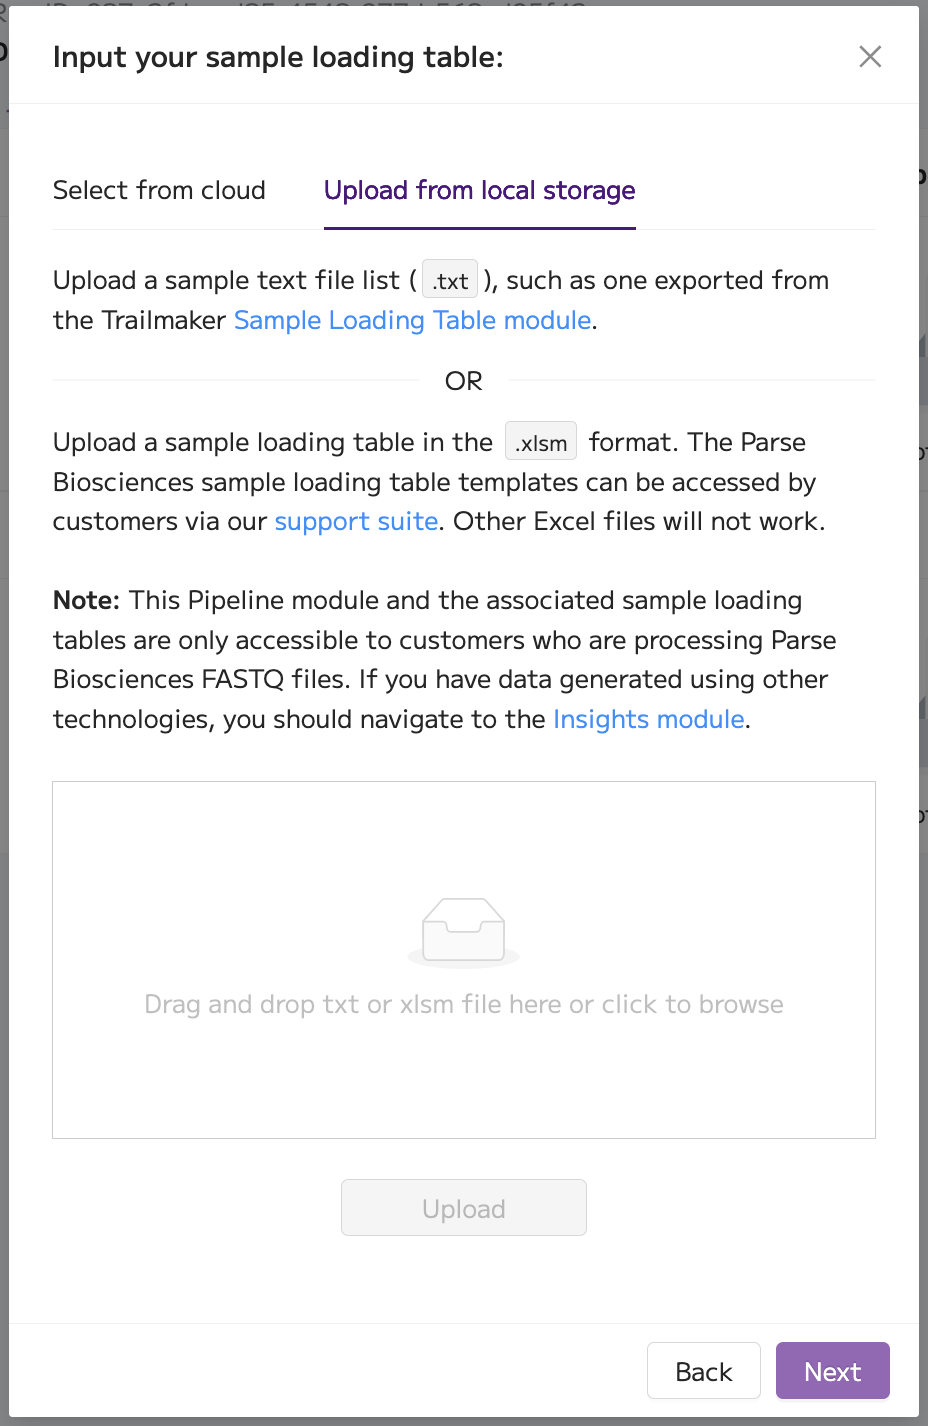
Alternatively, the second tab 'Upload from local storage' allows you to upload your sample loading table from your computer. Supported file formats include the Sample Specification List (.txt) file that can be downloaded from the Sample Loading Table module, and the Excel (.xlsm) file format that is available to download from our support suite. In both cases, the official Parse Biosciences sample loading table template for the relevant kit is required. Files in .txt or .xlsm formats that are not generated from the approved template will not work.
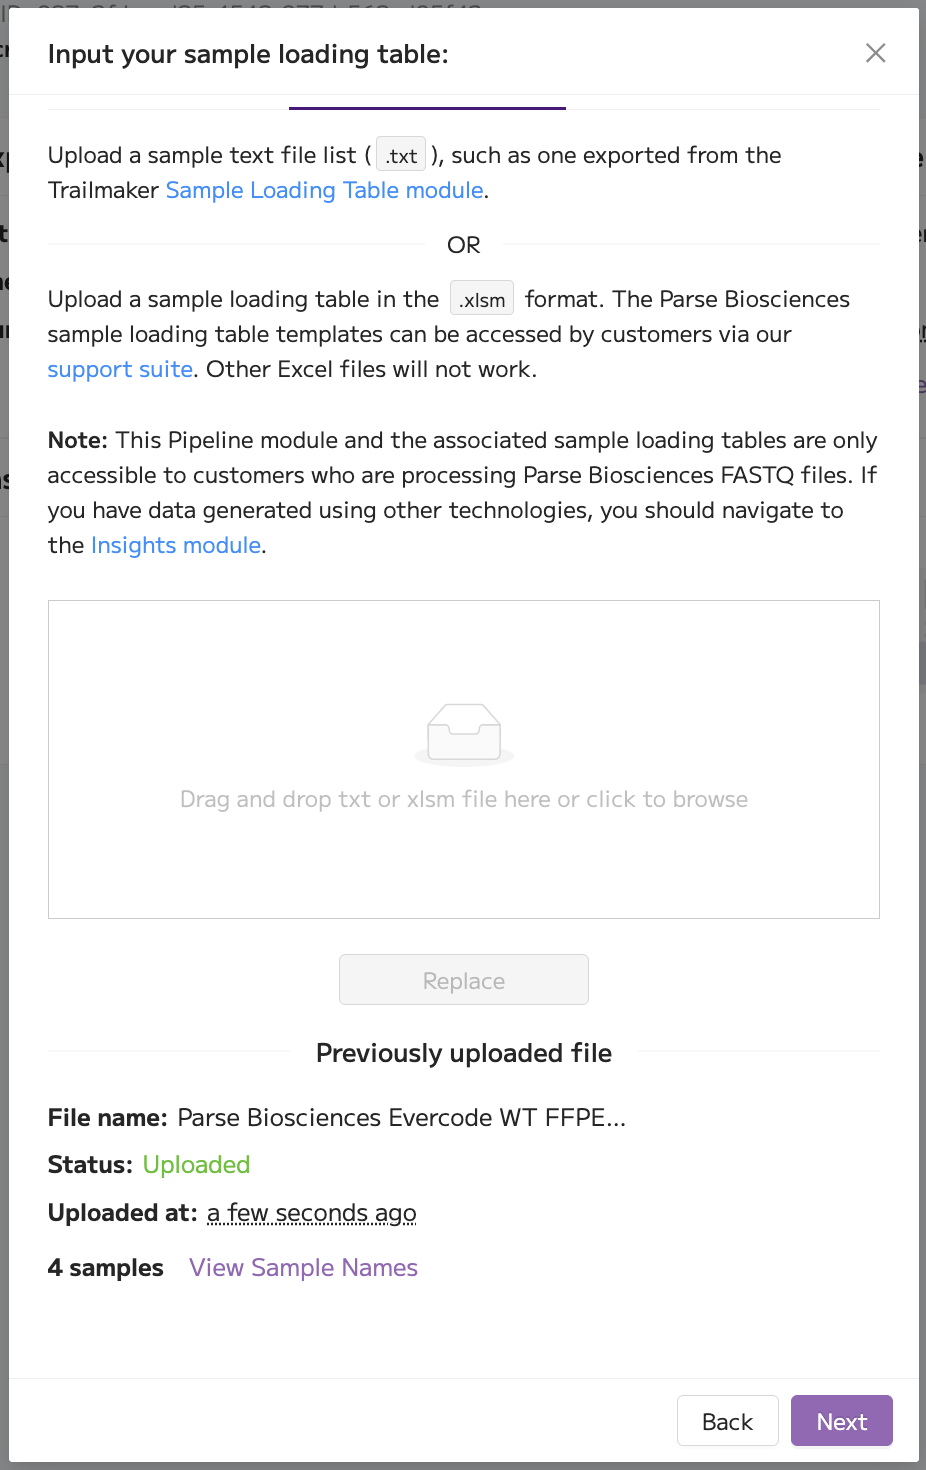
Simply drag and drop the file into the box, and click ‘Upload’. The file will upload in just a few seconds. Once uploaded, you can view the file name, upload date/time, as well as the number of samples and the sample names.
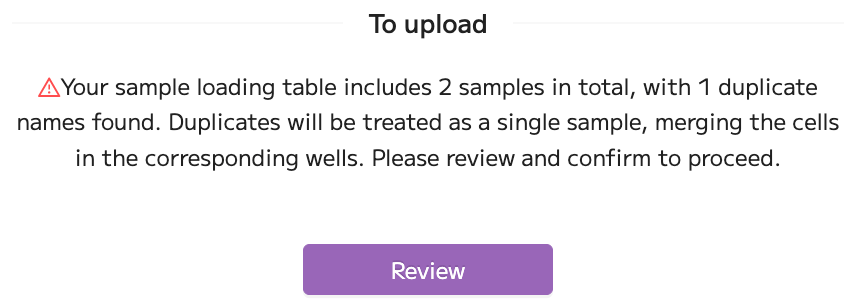
Note that if your selected sample loading table contains duplicate sample names, the following warning will appear. Duplicate sample names should be reviewed before continuing. If the duplicated sample names are biological replicates, you should edit your sample loading table to assign unique sample names, and re-upload or re-import it.
When you are ready to continue, click ‘Next’.
Reference genome
In the next step, select the reference genome for aligning your whole transcriptome data using the dropdown menu.
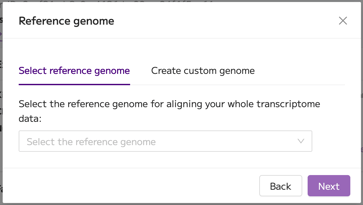
If the genome you require is not available in the dropdown menu list, select the ‘Create custom genome’ tab to create a custom genome. For this, you'll need your relevant FASTA and annotation files (see below). Provide a name and description for your custom genome, adhering to the character limitations provided in the information tooltips. These will be used to create the genome name that will then appear in the reference genome dropdown menu list, as “name: description”.
Then, select or drop your FASTA and annotation files. You must drop two files together: one FASTA file (*.fa/.fasta/.fna[.gz]) and one annotation file (*.gtf/.gff3[.gz]). Upload one matched FASTA/annotation pair per drop. You can add multiple pairs by dropping again.
Further guidance on appending reporter genes, viral genes, or custom gene sequences to your species of interest is available to Parse Biosciences customers in our article Adding Custom Sequences and Gene Annotation File Formatting.
If you are working with mixed species, reach out to support@parsebiosciences.com for help.
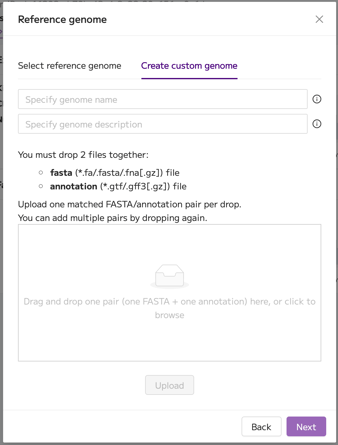
Once your matched FASTA/annotation file pair(s) are dropped, click ‘Upload’ to upload the files. Uploaded files are listed at the bottom of the modal.
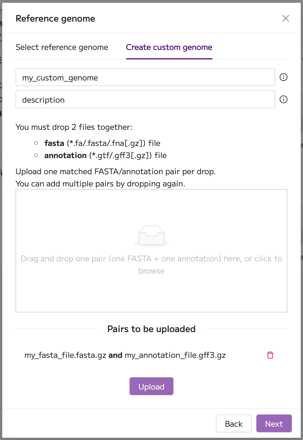
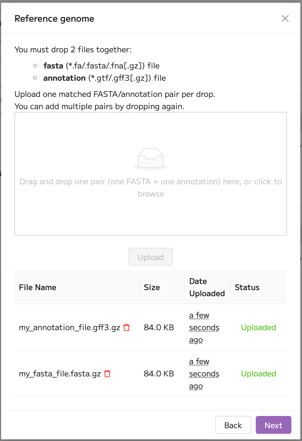
Custom genomes are built when the Pipeline Run is initiated. Once built successfully, your custom genome will be available to select in other Pipeline Runs within your Trailmaker account.
Your custom genome is only available to you, except in cases where you share a Pipeline Run with another Trailmaker user.
- If you share a successfully completed Pipeline Run with a custom genome, then the custom genome will be available to both the original Run owner and the newly added user.
- If you transfer ownership of a Pipeline Run with an unbuilt custom genome (before the Pipeline Run has ran successfully), then the custom genome will be transferred to the new owner together with the Pipeline Run.
Immune database
If you selected an immune profiling (TCR or BCR) kit, the next step of the wizard is where you select the immune database. For TCR kits, the options are Human or Mouse, and for BCR kits the options are Human, Mouse or Transgenic mouse.
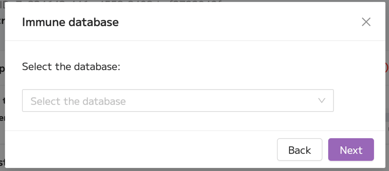
When you are ready to continue, click ‘Next’.
FASTQ file upload
In the final step of the wizard, FASTQ files are uploaded. Trailmaker offers two options for FASTQ file upload: by drag and drop into the current step of the wizard via your web browser or via console (command line) upload. The instructions for FASTQ file upload via the web browser are shown by default.
Note that the on-screen instructions for FASTQ file upload depend on the kit type selected:
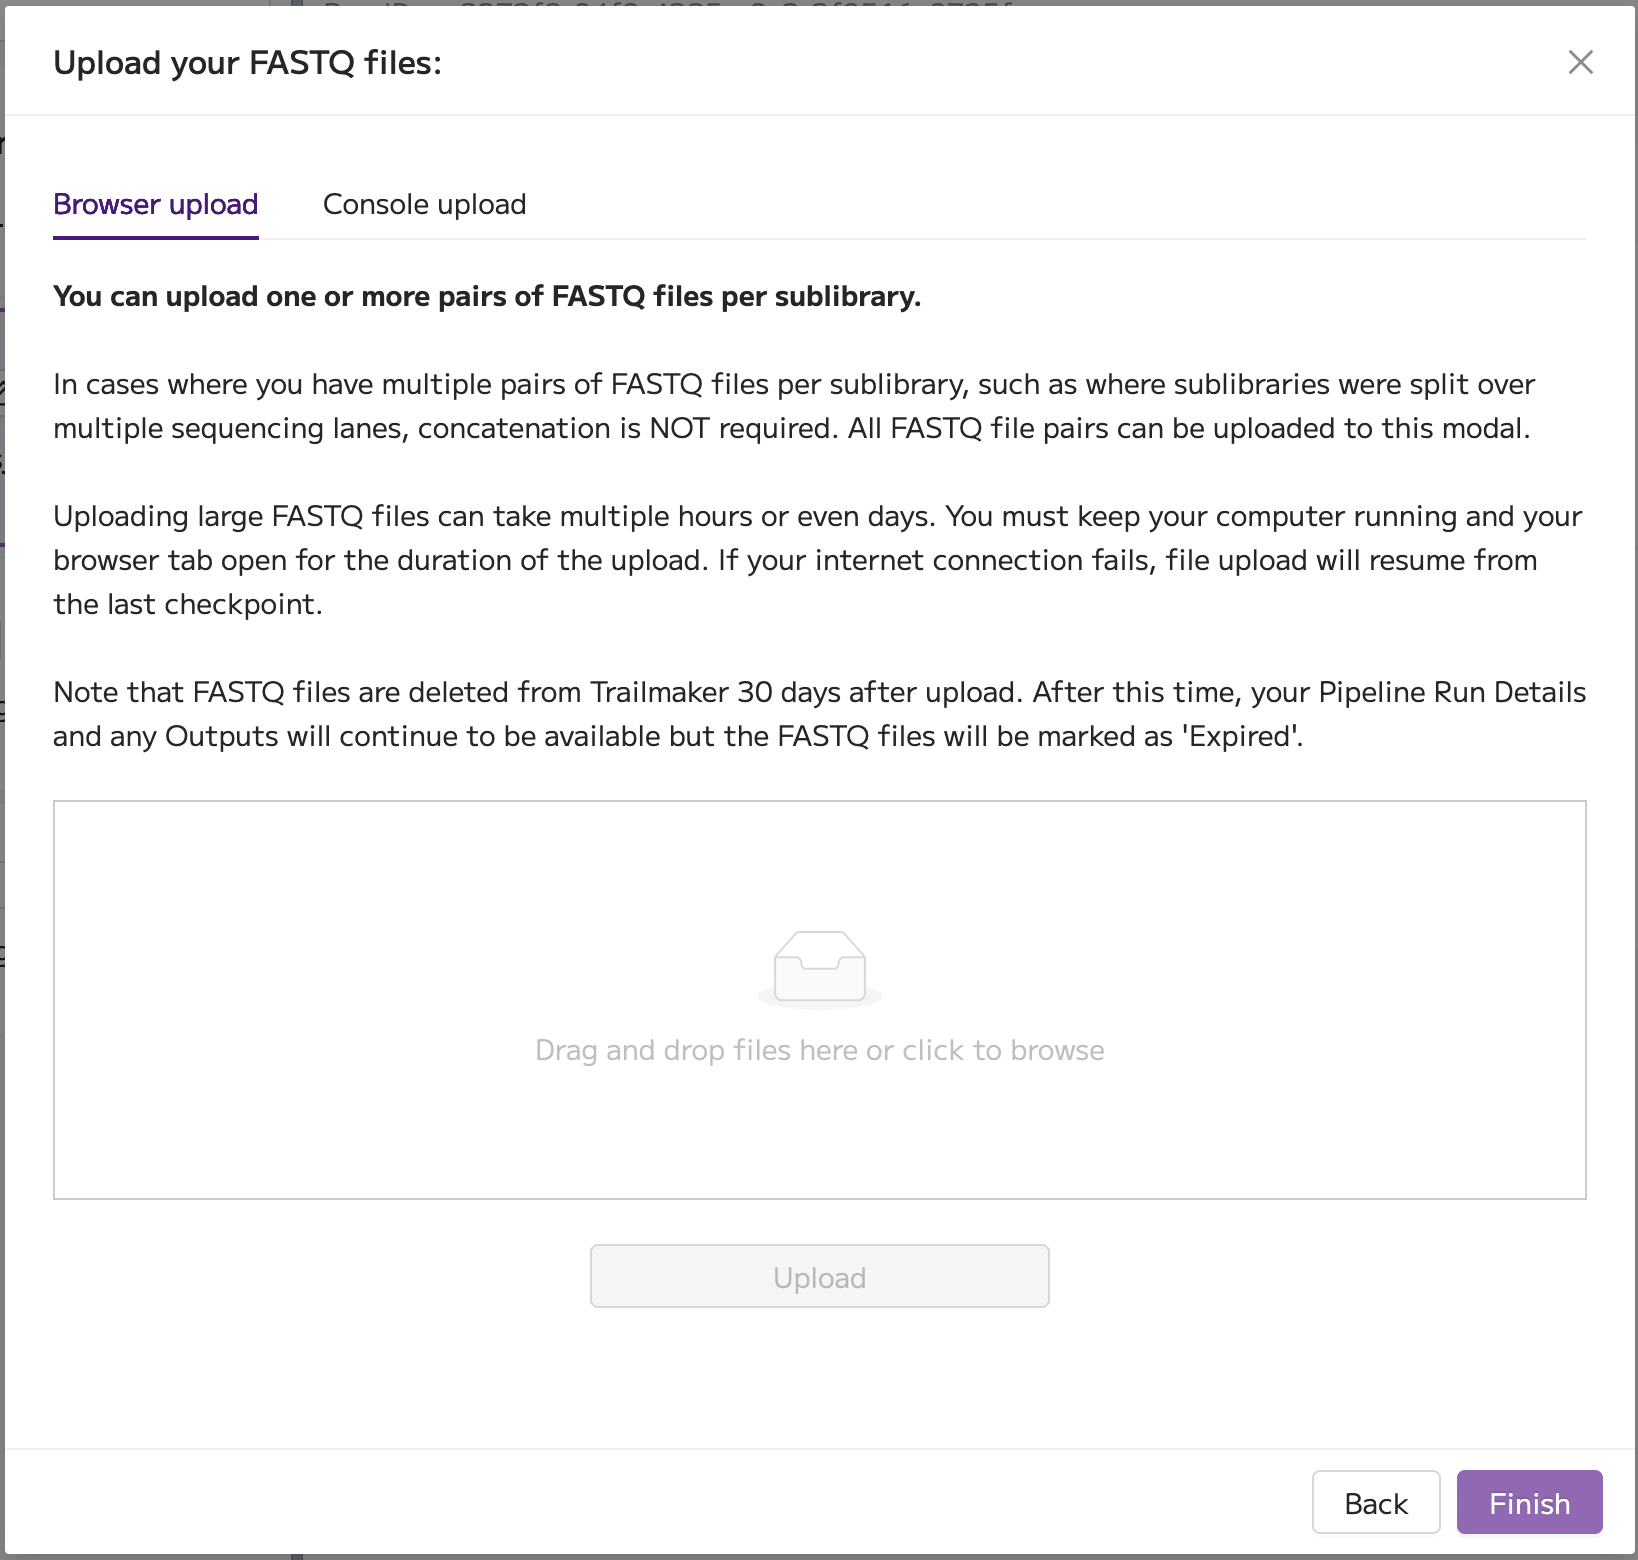
- For Whole Transcriptome kits, you'll see the following instructions.
When uploading FASTQ files, you must provide paired R1 and R2 files. You can provide one or multiple pairs of FASTQ files per sublibrary. In cases where you have multiple pairs of FASTQ files per sublibrary, such as where sublibraries were split over multiple sequencing lanes, concatenation is NOT required. All FASTQ file pairs can be uploaded to this modal.
Drag and drop the FASTQ files to the box, then click Upload.
- For immune profiling (TCR or BCR) kits with paired whole transcriptome data, you'll see the following instructions.
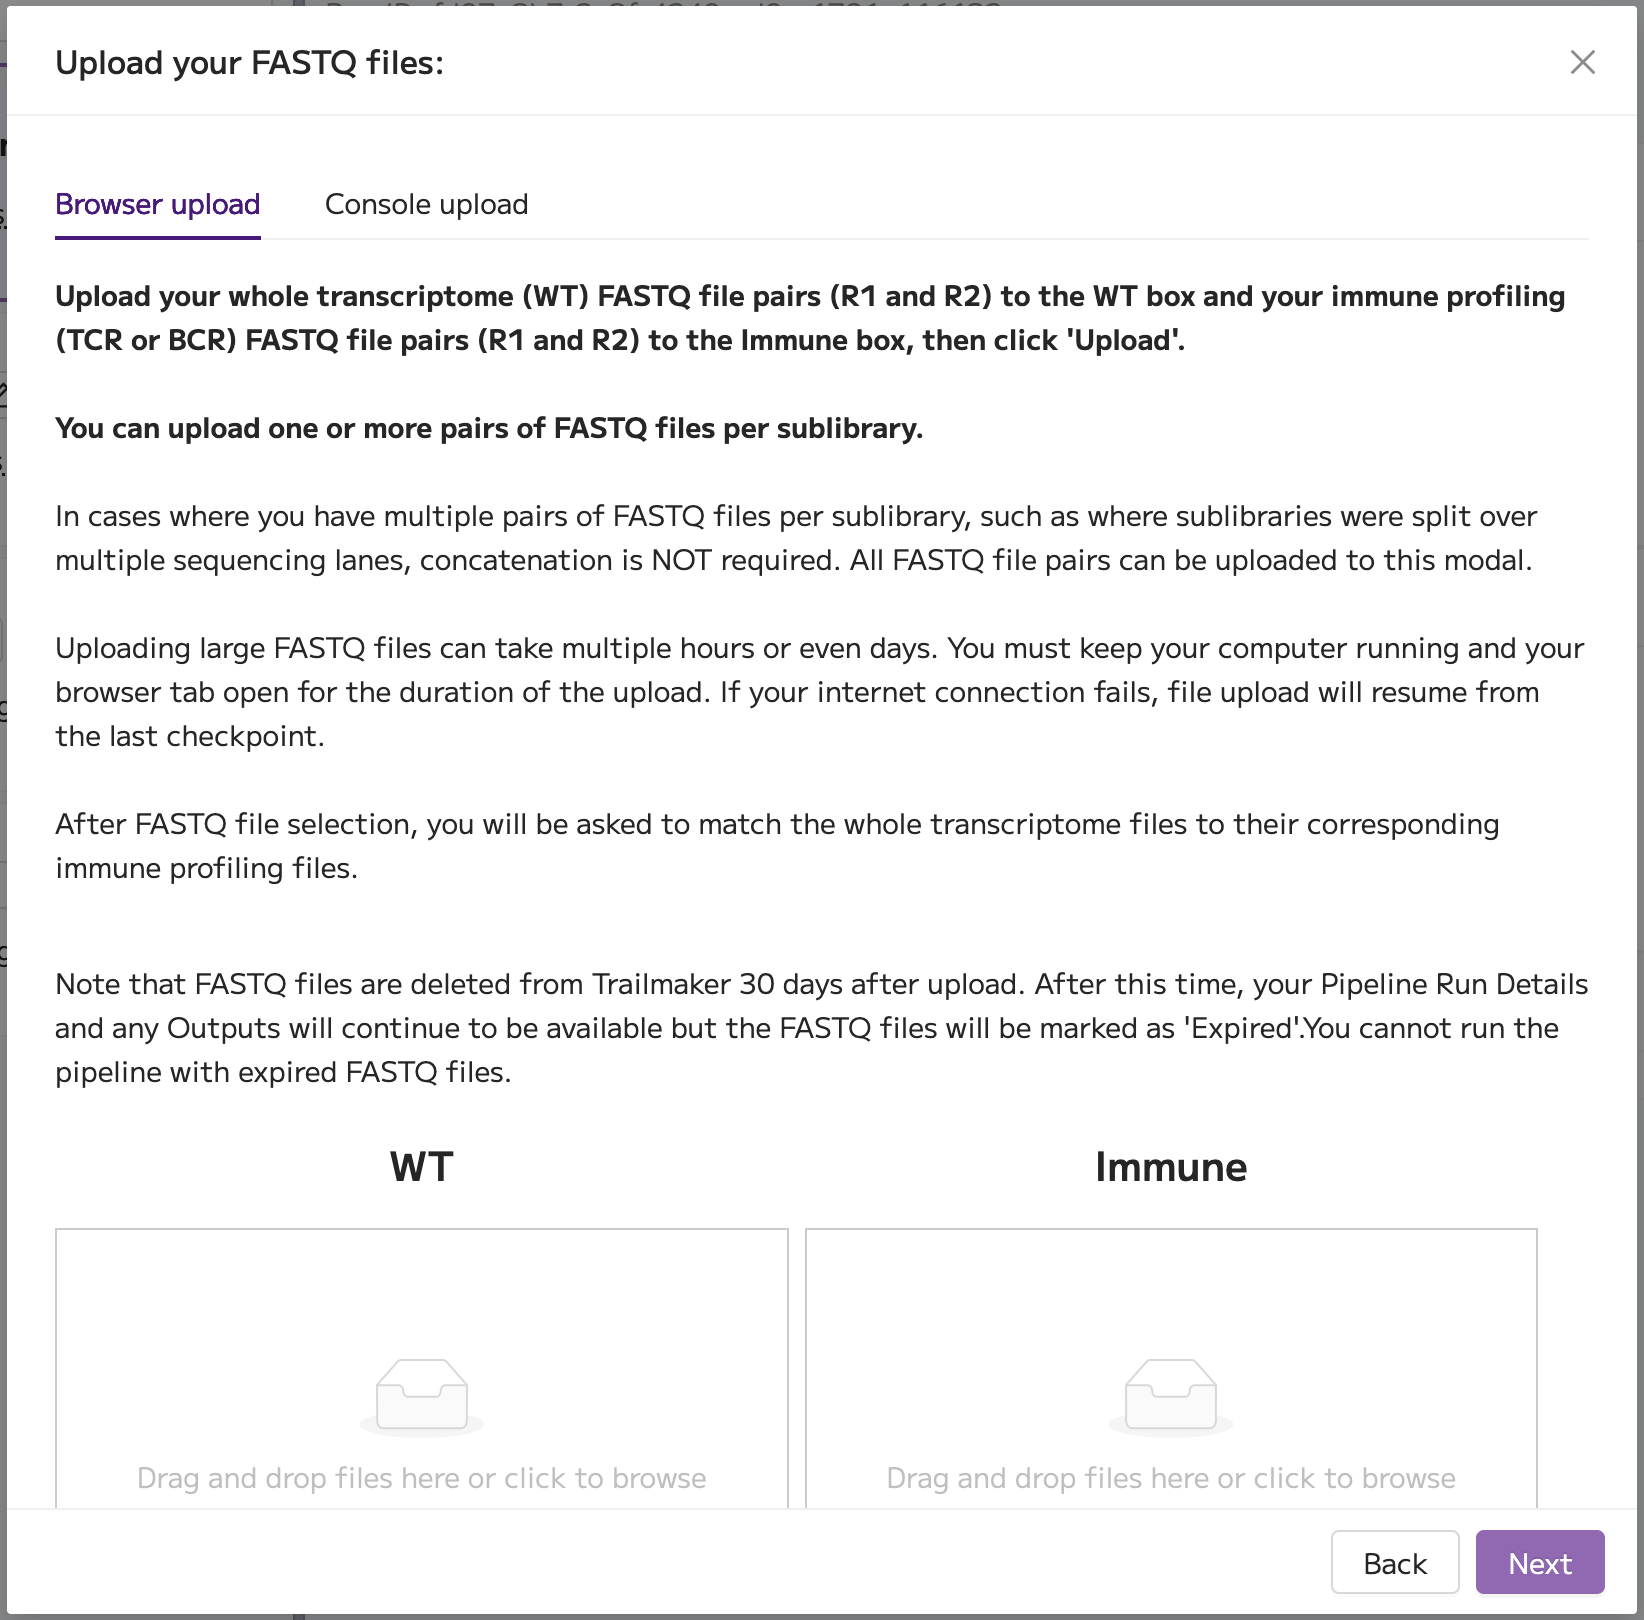
Upload your whole transcriptome (WT) FASTQ file pairs (R1 and R2) to the WT box and your immune profiling (TCR or BCR) FASTQ file pairs (R1 and R2) to the Immune box, then click 'Upload'. You can upload one or more pairs of FASTQ files per sublibrary. In cases where you have multiple pairs of FASTQ files per sublibrary, such as where sublibraries were split over multiple sequencing lanes, concatenation is NOT required. All FASTQ file pairs can be uploaded to this modal.
Drag and drop the WT FASTQ files to the left box, and the immune profiling FASTQ files to the right box, then click Upload.
- For immune profiling (TCR or BCR) kits without paired whole transcriptome data, you'll see the following instructions.
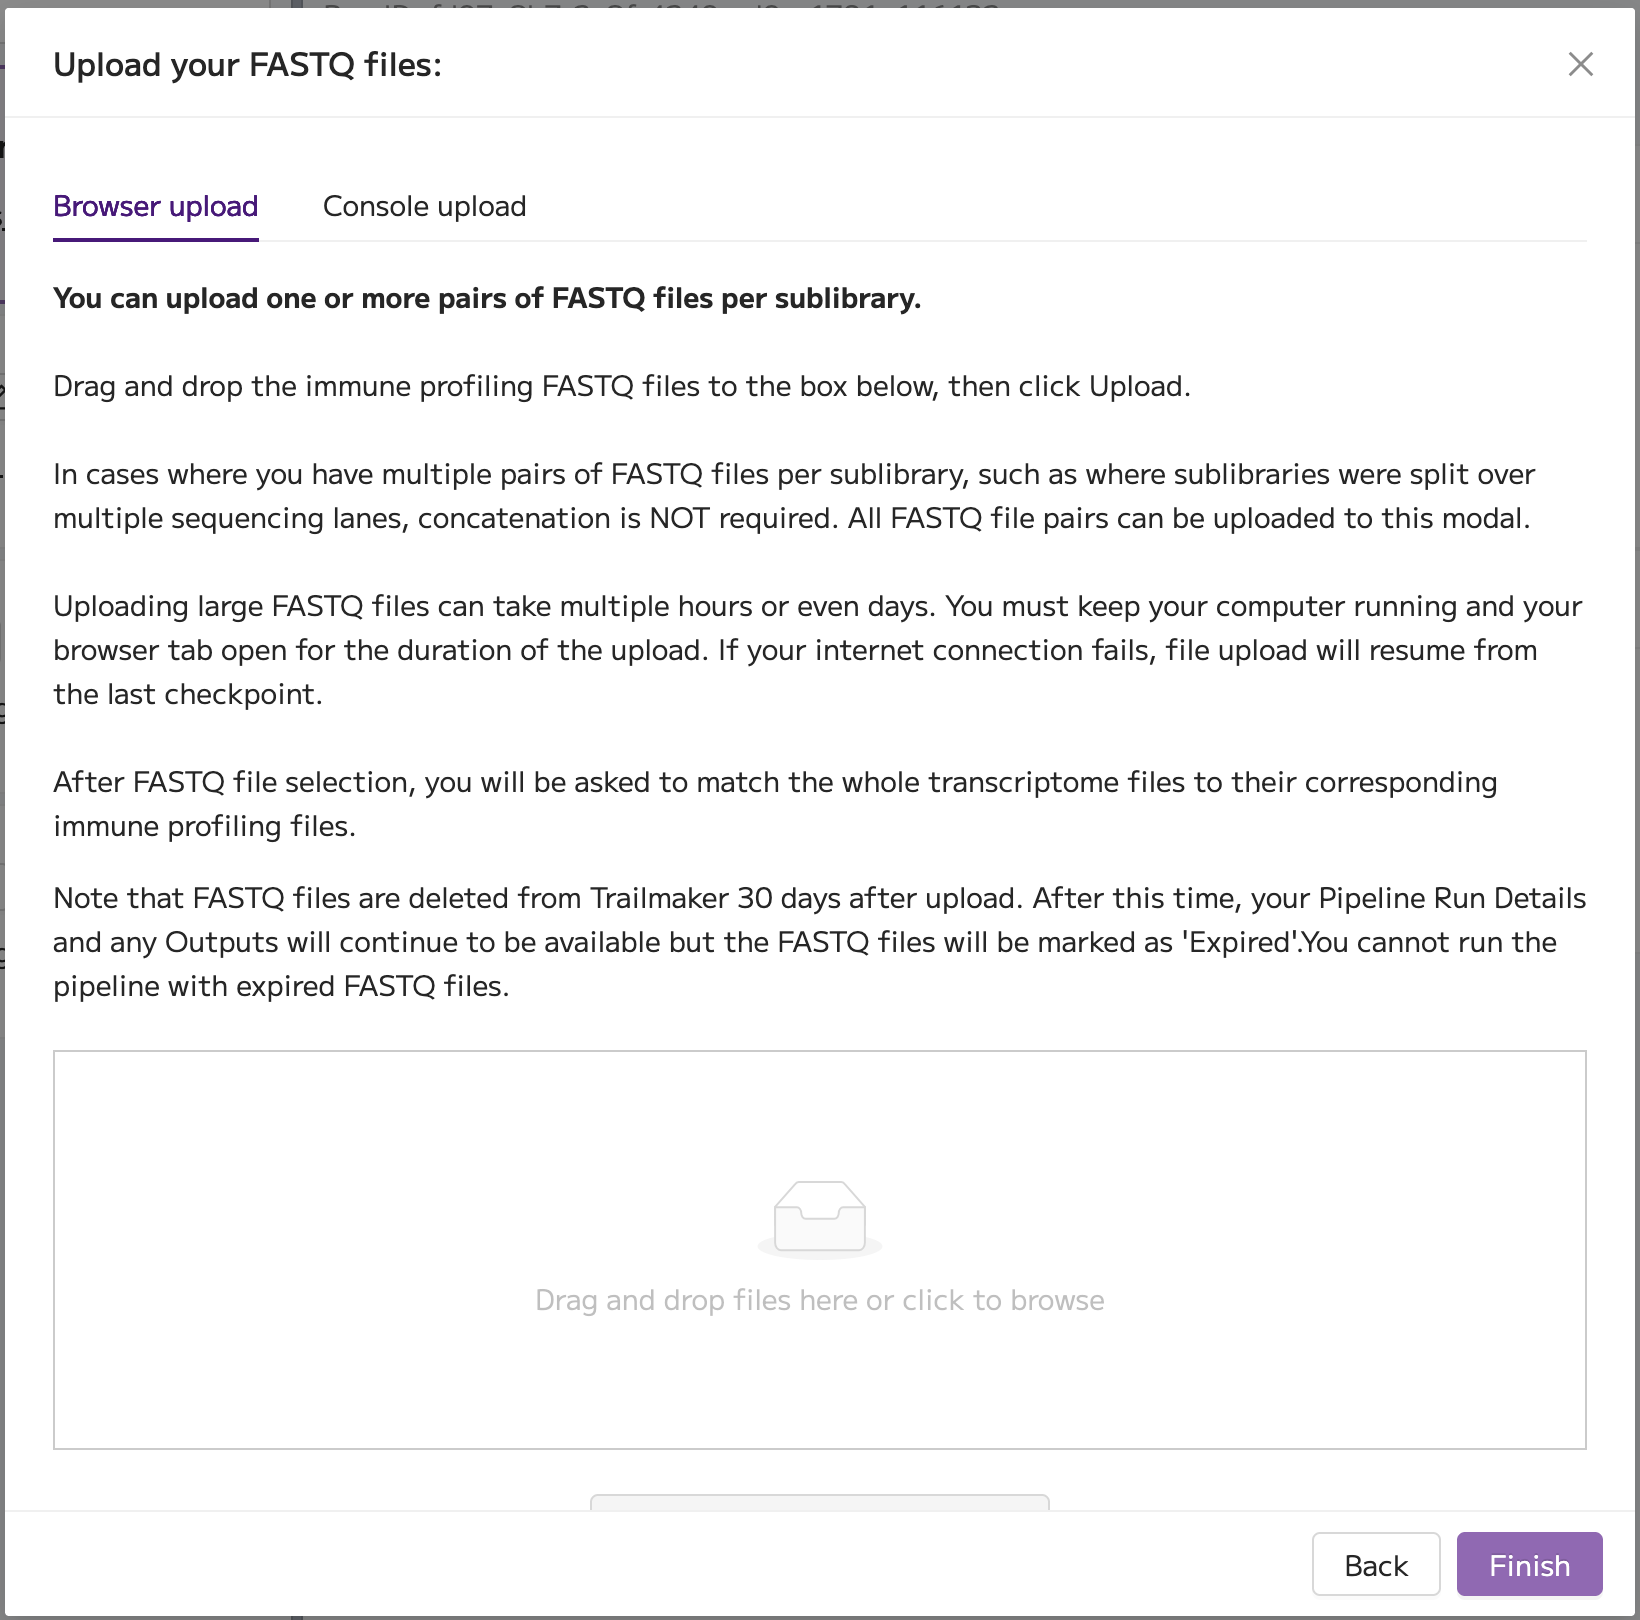
You can upload one or more pairs of FASTQ files per sublibrary. These should be paired (R1 and R2) files corresponding to the immune profiling data.
Drag and drop the immune profiling FASTQ files to the box below, then click Upload.
Alternatively, to upload FASTQ files via the command line, select the ‘Console upload’ option. Start by downloading the ‘parse-upload.py’ script. Then, click the ‘Generate token’ button.
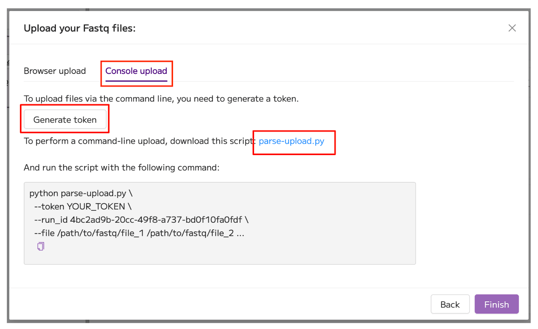
Once your token is generated, click the ‘Copy to clipboard’ button at the bottom of the script box. Note that the script is different depending on whether you have whole transcriptome only data, immune profiling (TCR or BCR) data with paired whole transcriptome data, or immune profiling (TCR or BCR) data only.
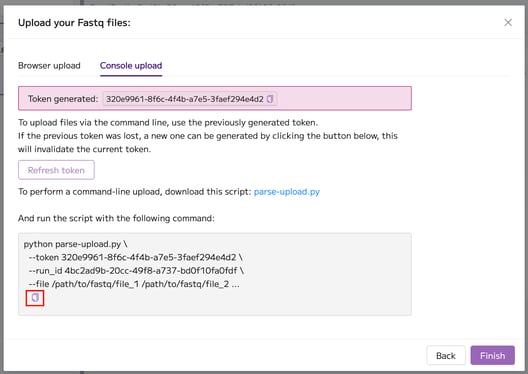
Open your command line tool (for example, Terminal for Mac users or Powershell for Windows users) and paste the copied script. There are two changes that you will need to make before running the script:
- Define the path to the parse-upload.py script that you downloaded from Trailmaker.
- Define the path(s) to the FASTQ files that you want to upload. You can specify a single or multiple file paths regardless of your kit type. For immune profiling (TCR or BCR) runs with paired WT data, you need to specify the WT and immune files separately.
When you run the script, you will be prompted to confirm the correct files for upload.

Data upload progress is then shown in the console.

The file upload progress is also reported in Trailmaker, indicating that the file is being uploaded from the console.

When upload is complete, both the console and Trailmaker FASTQ file upload modal report this.


Note that FASTQ file requirements in Trailmaker are as follows:
- FASTQ files from the same Parse Biosciences experiment that have different Illumina indexes should not be concatenated. These files are separate sublibraries.
- FASTQ files from the same Parse Biosciences experiment that share identical Illumina indexes do not need to be concatenated before uploading to Trailmaker - all FASTQ file pairs can be uploaded.
- When uploading FASTQ files, you must provide paired R1 and R2 files.
Note the following details about the FASTQ file upload process in Trailmaker:
- Uploading large FASTQ files can take multiple hours or even days. You must keep your computer running and your browser tab open for the duration of the upload.
- If your internet connection fails, file upload will resume from the last checkpoint. Checkpoints are created every 128 MB.
- The FASTQ file size limit for upload to Trailmaker is 5TB per file.
Note: From 26th February 2026 onwards, FASTQ file pairs are internally ordered based on the sublibrary name extracted from the FASTQ filenames. This ensures consistent sublibrary ordering across repeated runs, independent of the upload order.
FASTQ files are deleted from Trailmaker 30 days after upload. After this time, your Pipeline Run Details and any Outputs will continue to be available but the FASTQ files will be marked as 'Expired'.
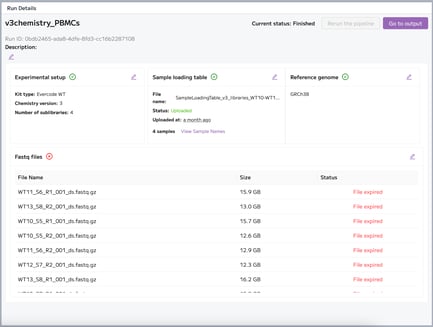
Note that FASTQ files are not available to download from Trailmaker.
For further instructions and support on command line upload of FASTQ files to Trailmaker, see: How to upload FASTQ files to Trailmaker using command line.
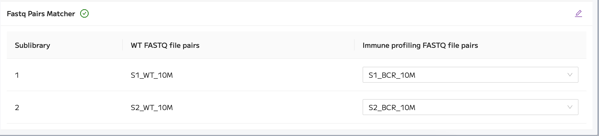
For immune profiling (TCR or BCR) runs with paired WT data, the WT and immune FASTQ file pairs need to be matched before the pipeline run can be initiated. This is done in the Run Details page after the final step of the wizard. The WT FASTQ file pairs are listed, with a row per sublibrary. In the case of multiple FASTQ file pairs per sublibrary, these may need to be assigned. The matching immune FASTQ file pair(s) should be selected using the dropdown menus in the final column of the FASTQ pair matcher table.
Running the Pipeline
Running the pipeline is blocked when any of the required fields in the Run Details page are incomplete. In this case, the ‘Run the pipeline’ button is disabled.

When all required fields are complete and the required data files have been successfully uploaded, all sections will be marked with a green tick and the ‘Run the pipeline’ button becomes enabled.
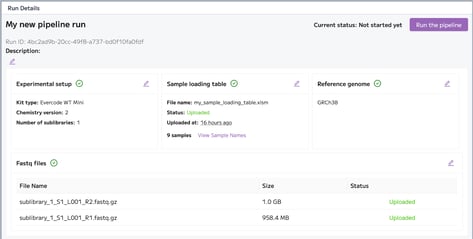
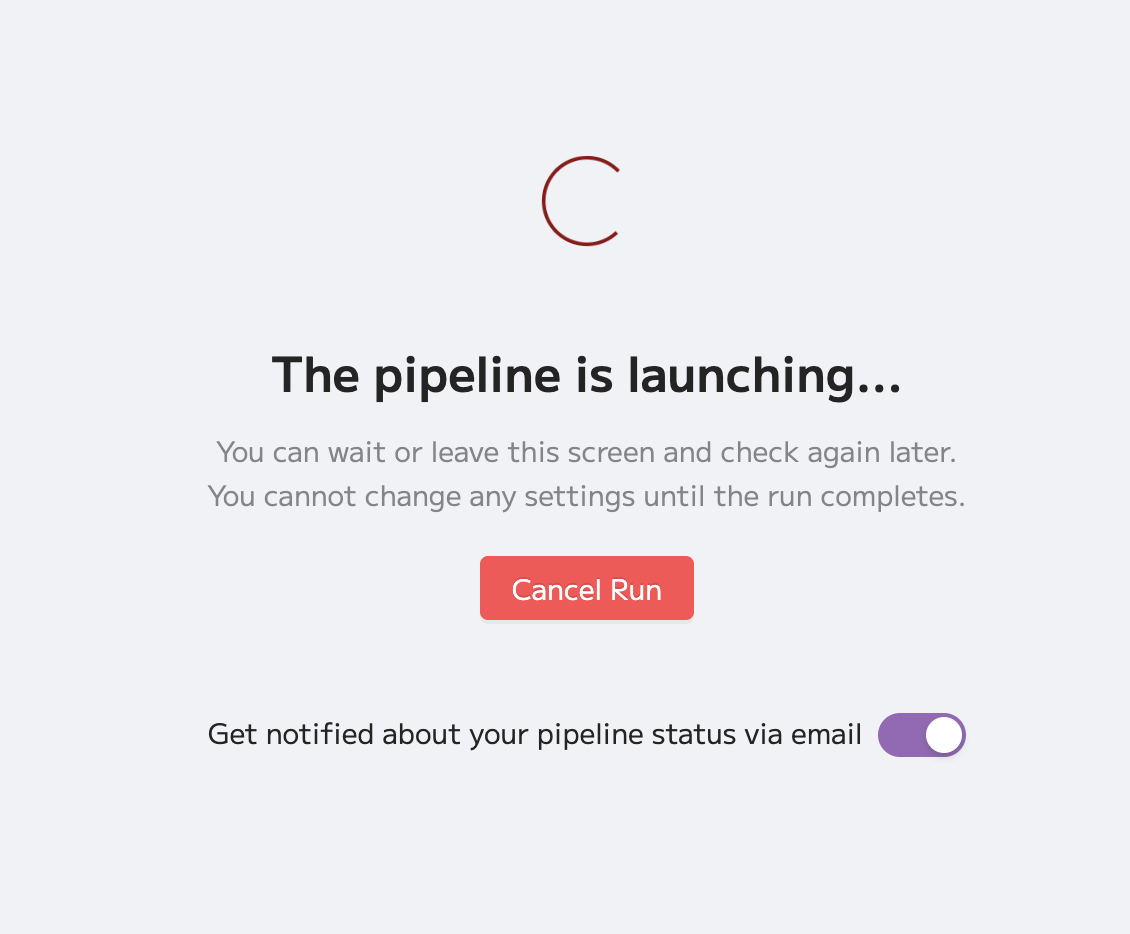
Clicking ‘Run the pipeline’ starts your pipeline run. For the first few minutes, the pipeline launches and does some initial checks. Y
Then, when the pipeline is fully running, the progress is shown, together with the option to view the current logs by selecting the sublibrary. Each sublibrary has its own log stream. Note that the pipeline steps, and therefore logs, will differ depending on whether you have whole transcriptome only data, immune profiling (TCR or BCR) data with paired whole transcriptome data, or immune profiling (TCR or BCR) data only.
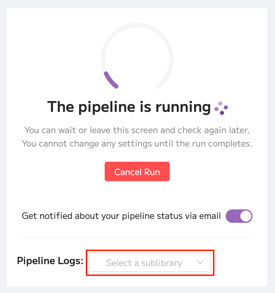
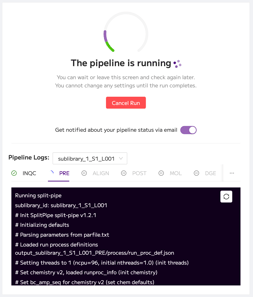
ou can select to cancel the pipeline run while it is running.
Whilst your pipeline is running, you can navigate away from Trailmaker and shut down your computer - the pipeline will continue to run. You can choose to receive an email notification when your run is finished.
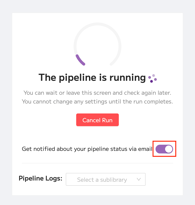
The duration of your pipeline run depends on the kit type, the number of cells in your experiment as well as the sequencing depth. A typical WT Mini pipeline run time is 6-12 hours; for a WT kit it’s 12-24 hours; and for a WT Mega or WT Mega 384 kit it could take 24+ hours. Immune profiling (TCR or BCR) runs with paired WT data take longer than WT only runs.
Users can run multiple Pipeline Runs in parallel.
Pipeline Version
The Pipeline module in Trailmaker operates the Parse pipeline. The current and previous versions of the pipeline used in Trailmaker are reported below:
- From 3rd September 2026 to date: v1.9.0
- From 24th July 2026 to 3rd September 2026: v1.8.2
- From 15th June 2026 to 24th July 2026: v1.8.1
- From 5th May 2026 to 15th June 2026: v1.7.3
- From 27th April 2026 to 5th May 2026: v1.7.2
- From 27th March 2026 to 27th April 2026: v1.7.1
- From 16th March 2026 to 27th March 2026: v1.7.0
- From 10th December 2025 to 16th March 2026: v1.6.3
- From 6th November 2025 to 10th December 2025: v1.6.2
- From 29th August 2025 to 6th November 2025: v1.6.1
- From 15th July 2025 to 29th August 2025: v1.6.0
- From 3rd April 2025 to 15th July 2025: v1.5.1
- From 3rd March 2025 to 3rd April 2025: v1.5.0
- From 13th December 2024 to 3rd March 2025: v1.4.1
- From 7th November 2024 to 13th December 2024: v1.4.0
- From 26th March 2024 to 7th November 2024: v1.2.1
- From 21st March 2024 to 26th March 2024: v1.2.0
The pipeline version used to process your run in Trailmaker is stated at the bottom of the Pipeline Outputs page. We recommend that you report the pipeline version when publishing your data analysis.
Pipeline Outputs
See also: Guided walkthrough: Pipeline Outputs
Successful pipeline runs will display the reports in the Pipeline Outputs tab for you to explore. The “all samples” report is shown by default. You can choose to view the reports for individual samples using the dropdown menu at the top of the page.
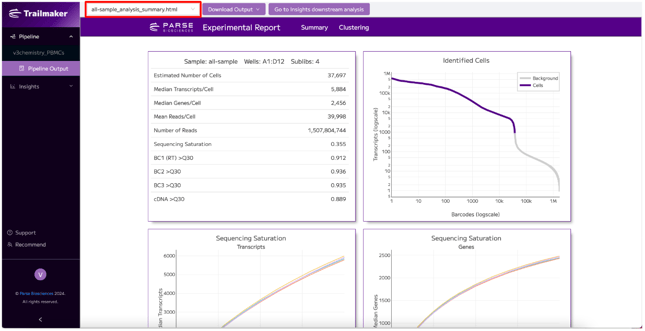
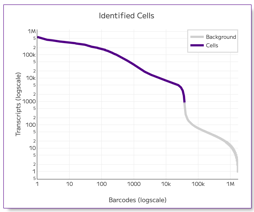
In the barcode rank plot, you’re looking for a clearly defined ‘knee’ with the threshold in the steepest part of the drop. This threshold is dynamically set and is likely to be different for different samples. The multiple shades denote min, mean, max cutoff values. If you hover over the legend box (top right), you see the actual values.
The QC metrics include the estimated number of cells as well as the median number of genes and transcripts per cell. These metrics can be compared across samples, and can be considered in the context of published data or your previous experiments.
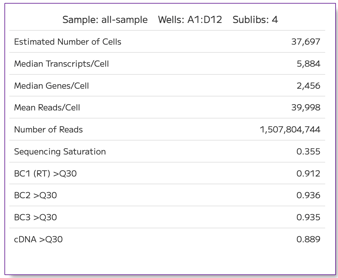
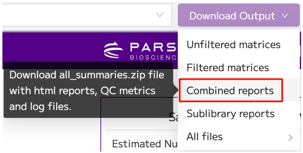
Further metrics are available in the csv file that can be downloaded in the "Combined reports" option.
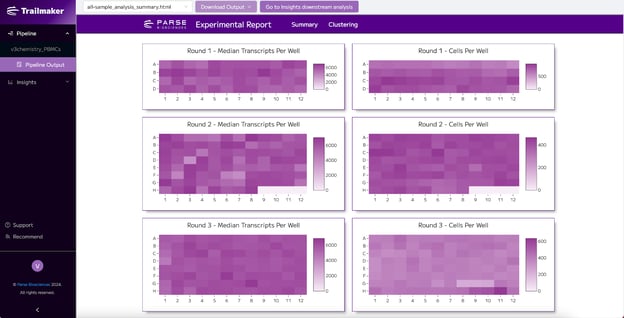
The plate heatmaps underneath the plots display transcripts and cells per well and are useful for catching pipetting and plate loading errors. Ideally, you'd like to see a homogenous distribution across the plates with no streaks or outliers.
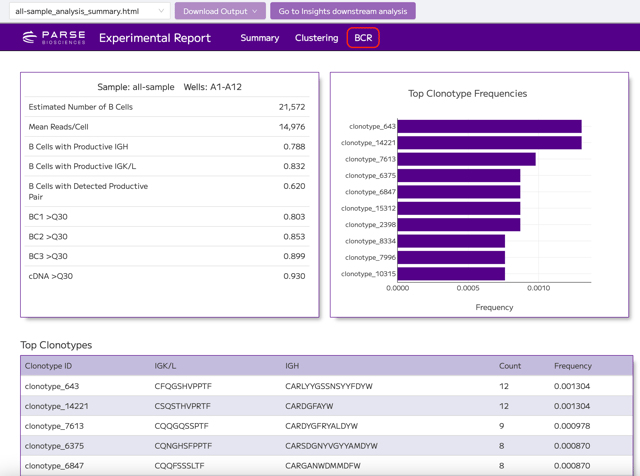
Pipeline Outputs from immune profiling (BCR or TCR) runs also contain a BCR or TCR tab which provides statistics and graphical reports of the immune run:
At the bottom of the Pipeline Outputs page, the pipeline version used to process your FASTQ files is stated. Further details of the pipeline versions used in Trailmaker can be found in the Pipeline Version section.

Downloading the Pipeline Outputs
The pipeline outputs are available to download from the Pipeline Outputs page.
The available download options for WT or paired immune + WT pipeline runs are:
- The cell by gene count matrices (also known as gene expression matrices) can be found in the “Unfiltered matrices” and “Filtered matrices” options. They are in the format: all_genes.csv, cell_metadata.csv and count_matrix.mtx. These are useful if you choose to perform downstream analysis outside of Trailmaker. Note that the filtered matrices expire 30 days after creation at which point they are no longer available to download.
-
- Unfiltered matrices: This matrix provides a more inclusive dataset for analysis with minimal initial filtering. Barcodes with fewer than 10 transcripts are filtered out, but no other filtering parameters are applied. Trailmaker Insights module automatically uses these unfiltered matrices for downstream analysis in order to allow user-control over filtering and quality control (QC) cleanup in the Insights module Data Processing page.
- Filtered matrices: Further filtered based on the threshold determined from the barcode-rank plot in the Pipeline outputs tab of the Pipeline module. Note that the same threshold is applied in the Data Processing module of Trailmaker Insights. For this reason it is not recommended to use the filtered matrix for analyses in Trailmaker Insights.
-
- The “Combined reports” option allows you to download the all_summaries.zip file which contains the html reports, QC metrics (as a csv file) and log files that are output from Parse’s pipeline combine mode.
- The “Sublibrary reports” option allows you to download the html reports, QC metrics (as a csv file) and log files for each independent sublibrary within your pipeline Run.
- The “All files” option contains the full pipeline output, including the alignment BAM files, that can be used in multiple downstream analysis tools including RNA Velocity. Downloading the “All files” option might take a long time for large datasets. For users who are comfortable with the command line, the “All files” option can be downloaded by copying the download command. Note that the “All files” download option expires 30 days after the creation of the pipeline outputs following a successful pipeline run, after which this option will no longer appear and the files are no longer available to download.
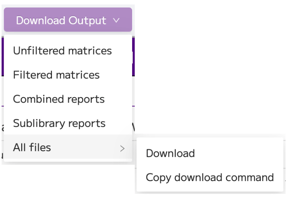
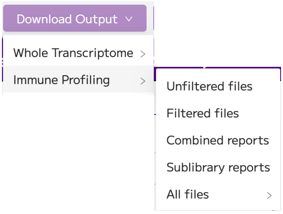
The available download options for immune profiling (TCR or BCR) pipeline runs are:
- "Unfiltered files" from the immune run.
- "Filtered files" from the immune run, which are filtered based on the barcode rank plot threshold that is selected by the pipeline.
- "Combined reports" contains the all_summaries.zip file with html reports, QC metrics and log files for immune pipeline run.
- "Sublibrary reports" contains html reports, QC metrics and log files for each independent sublibrary from the immune run.
- The "All files" option contains the full immune pipeline output.
Detailed explanation of the pipeline output files and folder structure is available in our support suite article: Overview of the Pipeline Outputs (Current Version). Our article on Content of FASTQ files and BAM files may also be useful. Ensure you are logged into the support suite to access these articles.
Failed Pipeline Runs
Failed pipeline runs give the option to download the logs for troubleshooting purposes:
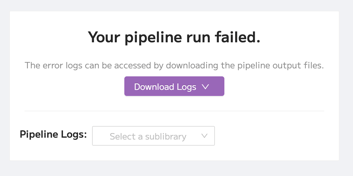
To troubleshoot failed pipeline runs, consult the article on How to troubleshoot Pipeline failures in Trailmaker in the first instance. If your pipeline failure error message is not covered in this article or you need further support, contact us at support@parsebiosciences.com.
Note that Pipeline Runs in Trailmaker that have experienced 2 consecutive failures cannot be re-triggered (i.e. the "Run the Pipeline" button becomes disabled). To initiate a Run that has failed twice, contact us at support@parsebiosciences.com.
Share Pipeline Run Details and Outputs
Within the Pipeline module Run Details page, the 'Share' button enables data sharing between users.
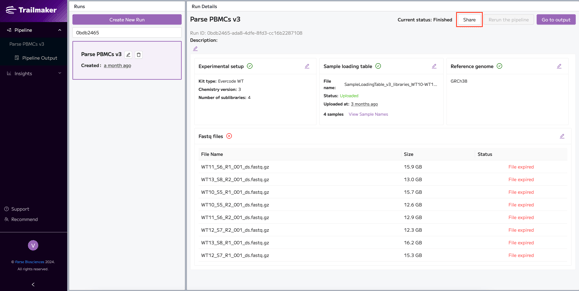
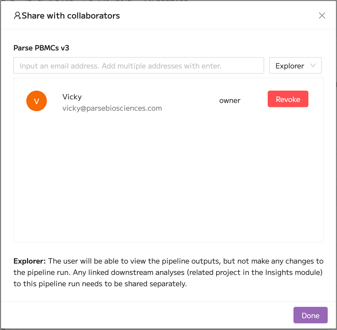
Clicking the 'Share' button will open a modal where the user can input the email address of the colleague, collaborator or Parse Biosciences team member with whom you want to share your Pipeline Run with. Once the email address is inserted, you can assign the level of permission you are granting to that person, as either owner or explorer.
- Explorers can view the Pipeline Details and Pipeline Outputs, but they cannot make any changes to the files or parameters in the pipeline Run. Explorers cannot initiate a pipeline Run. click 'Done'.
- There can be only one owner per Run. The owner has full control over the Run details, data file upload/deletion, as well as running the Pipeline. If you select another user as owner, you will be transferring ownership of that Run to the selected user. In doing so, you will lose all access to the Run.
Note that you can share with multiple other users at once by clicking ‘Enter’ after each email address.
When all email addresses have been inserted and the level of permissions assigned, click ‘Done’.
Owners can revoke access within the same 'Share' modal.
The collaborator(s) will then receive an email indicating that a Pipeline Run has been shared with them. If they already have a Trailmaker account, the Pipeline Run will automatically appear in their account. If they do not already have a Trailmaker account, they will receive an email with the link to sign up. If they sign up using the same email address the Run was shared with, then the Pipeline Run will automatically appear in their account once created.
Note that any linked downstream analyses (related project in the Insights module) to this Pipeline Run need to be shared separately. To do this, navigate to the Insights module Project Details page.
See also: How to Share Data in Trailmaker.